“Just Pull the Paneling and Paint” We Said. Hah.
As a few of you know I moved from an apartment after 30+ years to a slightly older home with my wife and added our 2 cats. We had inherited the family house, with a disabled bro in law, 2 more cats. So of course we are gently making it ours (2020’s) instead of Moms, (1958). The house of course has its own schedule in mind. We had been there a month when the main drain pipe gave it up and collapsed. That’s about the time the dishwasher quit and had to be replaced. Welcome to the new house!
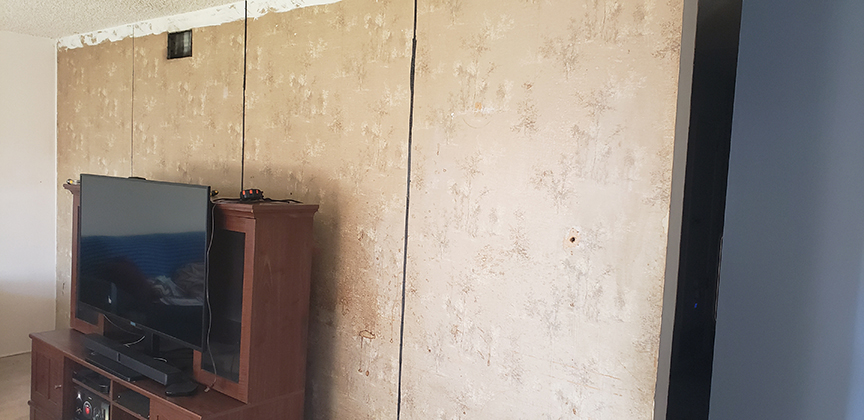
And yet we had not yet changed a thing! Time to get a tiny bit handy. We chose a small wall to remove old paneling and repaint and learn on. Easy peasy, tear off paneling, fix a few holes, prime, and paint. All good. Maybe $150 spent on paints and tools. Next up is the 16-foot wall behind the TV which has the same old paneling. The idea is to modernize one area at a time. As I removed the first panel I saw we were in trouble. Circa 1960’s wallpaper on 1958 drywall. Yikes. In for a penny in for a pound.

It was not long to discover the “easy” way out of this is thin drywall over all of it. Removing wallpaper from old drywall is a damaging and time-consuming idea. Easy if you have the know-how and have done this a lot. If you never have done drywall before, not so much! I flinched, got a quote from a contractor. $1,800 he said. I flinched again really hard, politely as possible declined the quote, and then went online to see about materials. By the way thanks to a few folks here who gave me some good free advice.
Material shortages? Not in the least. I avoid Home Depot and use Lowes because of how they manage and who runs things. Anyway, $15 each for four sheets of drywall. Mud, tape, screws, a cheap stud detector, a few hand tools. Everything was there in abundance and quantity. Well under $200. $1,600 ahead I’m thinking. Not bad right?
The first thing I found out was my cheapo “stud detector” was about as discerning as a drunken sorority girl on Spring break. The extra layer of drywall was too much for the cheapo Craftsman. The thing is I found out after I put all four sheets up with many misplaced screws. So a quick order of a far better stud detector went out and a couple of days later it (a Zircon brand) shows up. $45 well spent. Now I remove and properly replace a bunch of screws. Great, lots more holes to fill. Sinking all those screws to proper depth takes some energy and a bit of muscle. But all the sheets were flat and super secure. Wore me out one day.

Next up is some repair, “mudding” and taping of the seams. Sanding, more mud, more sanding. Lather, rinse repeat.

Finally, primer paint!

And finally, after maybe 18 hours of work, it’s 3/4ths done… I “paid’ myself about $100 an hour and got an education. Plus some cool tools that are sure to be useful over time.
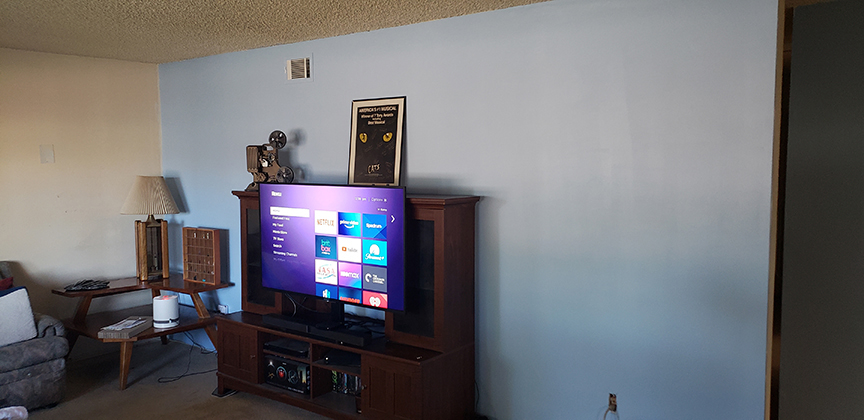
Our next step will be crown molding for indirect LED lighting around the room. Planning for dimmable color temp adjustable lighting. No disco colors, just warm to cool white. Old lamps go. Then we sell or give away the TV cabinet, put that flatscreen TV on the wall with an extendable mount, make nice shelves for each of the electronic boxes like DVR, Blue Ray, and Receiver. If I can source them affordably the plan is live edge wooden shelves with industrial pipe supports. That will have one room looking like it’s this century with a nice blend of natural material and modern light sourcing. And free up all that floor space.
Eventually, we get speakers and a receiver for Dolby Atmos sound but that’s next year!